The Metrici workbench provides an enhanced environment for creating and maintaining Metrici solutions.
Workbench screen
The workbench screen is arranged in three columns.
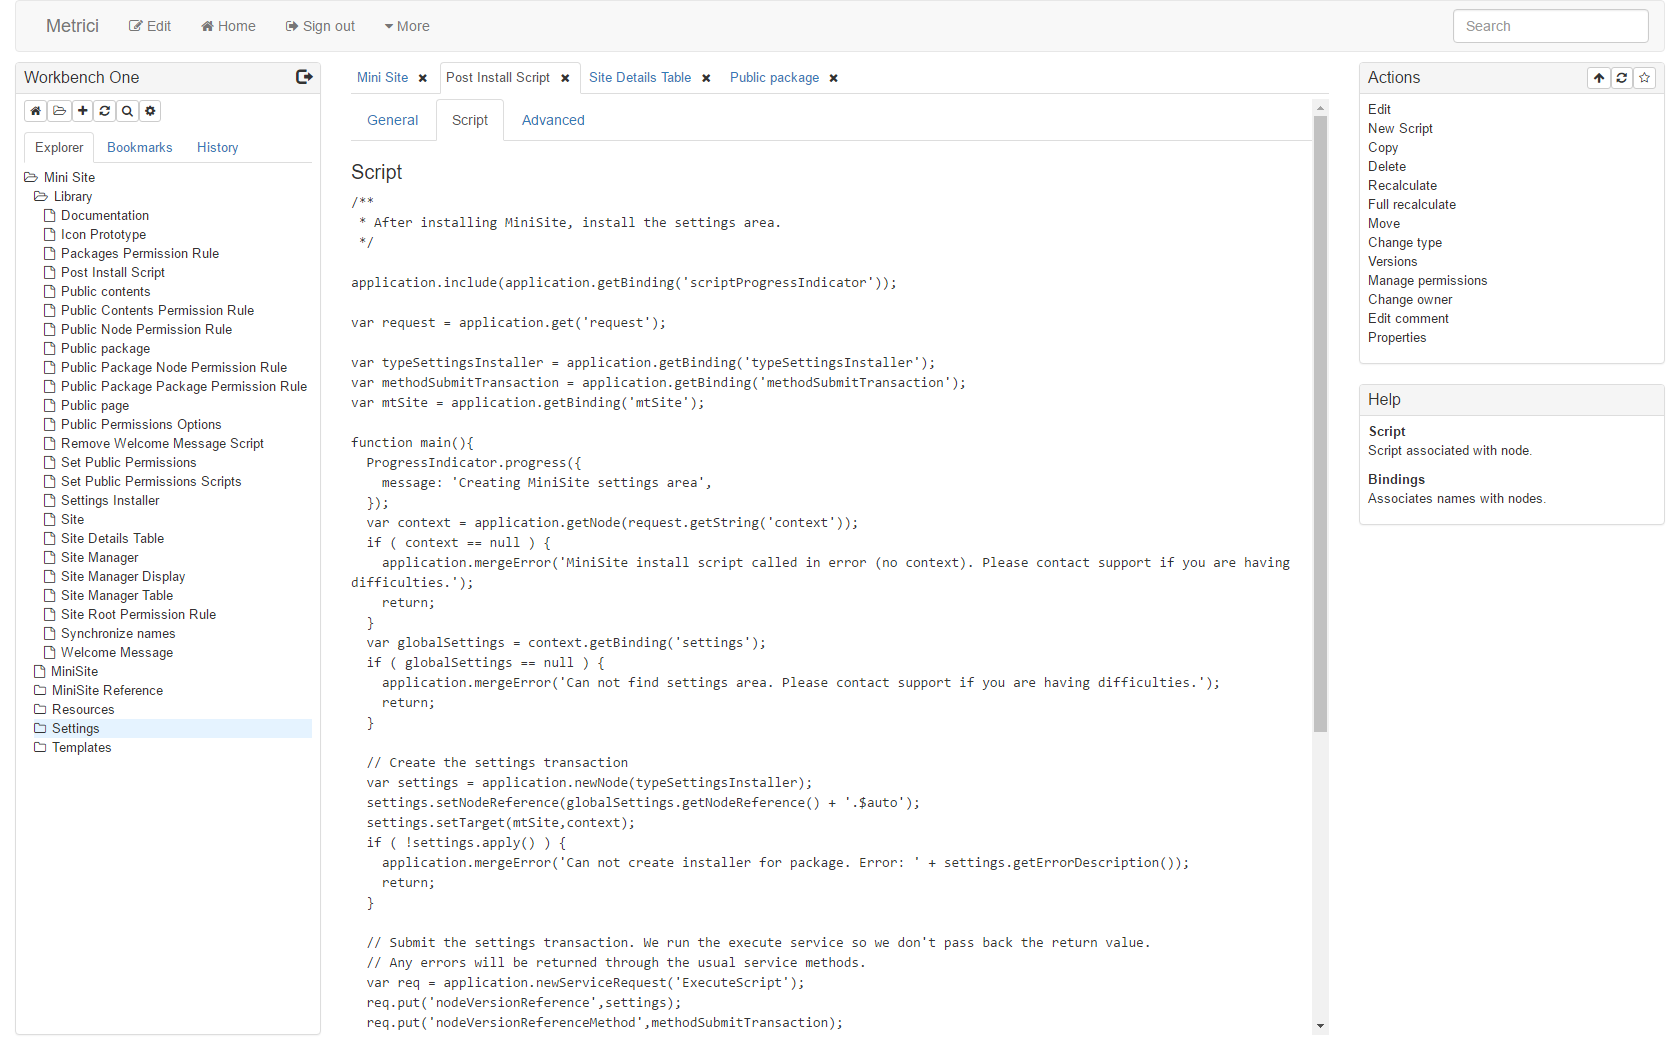
The leftmost column contains a list of buttons, node explorer, list of bookmarks and a history section.
The centre column contains a tabbed node work area.
The rightmost column contains the actions panel and the help panel.
To save space, the breadcrumb trail and footer are removed from the workbench screen, and the workbench name is moved to the top of the explorer panel on the left. You can exit the explorer by using the icon.
Only the content from the nodes in the work areas are shown – no header, title, breadcrumb or footer.
The state of the workbench is automatically saved. However, the nodes in the work area are not automatically saved, and you must save work before closing the workbench.
Workbench buttons
The workbench buttons ribbon provides actions that relate to the entire workbench. The options are
| Home | Open the project home page.page. | |
| Open | Open a node. Unlike clicking on the item in the explorer area, this always opens the item in a new tab, even if the same item is already in the work area. | |
| New | Create a new node. | |
| Refresh explorer | Refresh the explorer display (but not the work area). | |
| Search | Open the search page. If the open item is a folder, it searches from the item. If it is not, it searches from the item's parent folder. | |
| Settings | Open the settings page. |
The workbench panel heading also contains a icon to exit the workbench, and shows a icon when the state of the workbench is being saved.
Explorer
The explorer shows a list of files and folders. Click on the folder icons to open and close folders, click on the folder and node names to open the folders or nodes in the work area. If the item is already open in the work area, go to that tab.
Bookmarks
The bookmarks area shows a list of bookmarked nodes.
Add a new bookmark by clicking on in the actions area heading.
Drag bookmarks to reorder them.
Delete a bookmark by clicking on the to the right of the bookmark (visible when you hover over the bookmark).
History
The history shows a list of the most recently visited nodes. Click on an item to go to the associated tab, or to open a new tab with it on.
The history list is maintained automatically, and can contain up to 40 items. You can delete items from the history list in the same way as the bookmarks list.
Work area
The work area contains tabs showing one or more open nodes.
Drag the tabs to rearrange them, and click on to delete them.
Actions
The actions panel show actions for the currently active tab in the work area. These are the same actions available on the More menu for that item, plus a Properties action that shows the node properties.
The actions heading area may contain three icons:
| Up | Navigate to the parent package | |
| Refresh | Refresh the currently visible page. | |
| Bookmark | Bookmark the current visible page |
Help
Help shows help for the currently active tab in the work area. Help is built from the descriptions of the node type and member types, overridden as required by the Help and Member Type Help display properties.
Setting up a workbench
Use the Workbench (library.workbench.WorkbenchType) type to create a new workbench. Within this, set the description to the text you would like to see on the project home page, and the Project folders to a list of folders available through the workbench.
The project description is shown when you select the Home option. Use it to provide general introductory notes and guidance for people working on the work.